Save Money, Drink Tea (The Right Way)

Raise your hand f you can’t get through your morning without a little bit of morning caffeine – I know I certainly can’t. In fact, 65% of Canadian adults drink coffee, at an average of 2.8 cups a day, and 55% of coffee being consumed at breakfast (read more here).

Now, I myself am a tea drinker – tea is re-gaining popularity in North America, at the moment, due in part to speciality shops like Davids’ Tea and Teavana. These shops have marketed towards the younger generation, and created a new image of tea – not of it being a beverage that our grandmothers are drinking, but as something fun and delicious for us younger, ‘cool’ people (are you cool? I’m pretty sure I’m not – how do you tell?).

Davids’ Tea in particular has great marketing, and has created a huge range of what is more accurately to be called ‘tea and flavoured’ drinks, as many f their product offerings are not true teas, but teas with extras. These extras range from the usual  – fruits and nuts – to the not so usual – popcorn or sprinkles, anyone?

With all these new fancy options out there, people are discovering new teas and new things to enjoy – but at a recent brunch and knitting session with my gals, I discovered that not everyone knows how to properly prepare tea.

Now, it’s certainly no crime to prepare it in different ways, and although I consider myself a bit of a tea snob, you’ll never catch me with a thermometer, precisely measuring water temperatures or getting upset if I have to add my milk into the cup after adding tea.

BUT – there are some guidelines that I would definitely suggest you follow if you’re interested in brewing tea in ways that will bring out the right flavours, and best of all – save you money!

Tea, when brewed with a little guidance, is one of the cheapest ways to get our morning caffeine fix. I’ve included a link to a great article below with lots of info on different teas and some great guidelines for you to read. Of the many tea info sources on the web, I like this one as it stays relatively simple, and gives guidelines that don’t require any fancy equipment (or snobbery).

But before you read that, here are my own personal basic guidelines:

Pots

  • always brew tea in a pot
  • don’t buy one cup pots, those are pointless (even if they’re pretty)
  • Buy a minimum 4 cup pot, but a 6 cup pot is best!
  • Brewing in a pot means you are using one tea bag, and it’s going a lot further, saving you money

Tea Bags vs. Loose Leaf Tea

  • First of all, and most important – buy tea you like!
  • Tea bags – use only once! (small pulverized tea is optimized for fast brewing, and dispenses its flavour in one go)
  • Loose leaf tea – can usually be used 2-3 times! (large leaves means longer brewing time, and tea is not totally used up after one brew)

Black Tea

  • Boil that water!
  • Add milk to your cup before adding tea

Not Black Teas

  • Follow temperatures instructions from the article below, or that come with your tea
  • different teas need different temperatures, so you don’t burn the leaves, and end up not enjoying that more expensive tea

Fruit Infusions

  • Go nuts! (actually – nutty teas are delicious)
  • But really, experiment, and find what you like, there’s a lot of this stuff out there
  • Try it iced! A little fruit infusion can go a long way if you get an iced tea jug and keep it in your fridge
  • Iced fruity teas often go well with beverages of the adult variety… just sayin’

Let me know if you find any of these tips useful!

Tea Drinking: 17 Ways You’re Drinking Your Tea Wrong

Never Iron Again!

Alrighty, so today I’m handing out my technique for not ironing shirts and other items!

I don’t know about you guys, but I do not exactly have room in my teeny apartment for a full size ironing board. And, since my last roommate moved out, I haven’t had an apartment sized ironing board either. When I do want to iron, I am obligated to iron over a towel on my table – which isn’t that bad, don’t get me wrong, but I also really don’t like ironing. Mostly because I frequently find that I am trying to fit ironing around my morning when I notice the shirt I want to wear has a few more wrinkles than is strictly appropriate, and I have little time.

How have I solved this problem? Vinegar!

First off, vinegar is a great multi-use tool that has a million uses. Cleaning, cooking, deodorizing – lots of uses! It’s also super cheap, which is one of the reasons I love using it for everything.

But how do I solve the wrinkle problem with vinegar?

Spray bottle, bitches. (pardon my profanity)

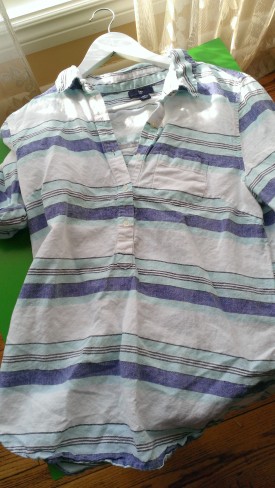
Very wrinkled shirt!

Very wrinkled shirt!

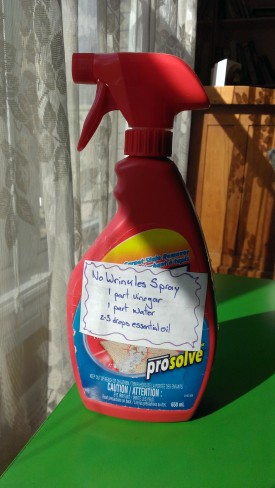
No-Wrinkles Spray

Mix 1 part vinegar with 1 part water into a spray bottle – feel free to add a few drops of your favourite essential oil if you want. Tea tree oil is a great oil to add, because it works with the vinegar to get rid of any odours that may be lingering in your shirt.

Re-purpose an old spray bottle - after washing it out very thoroughly.

Re-purpose an old spray bottle – after washing it out very thoroughly.

Hang up your shirt, and give it a few sprays – not too many, or the vinegar smell will stick around longer than you want! Shake your shirt, then let it hang while eating breakfast/having your morning coffee/running around trying to find your keys.

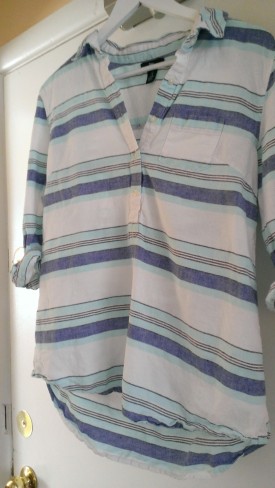
Return to find your shirt wrinkle free! Give it another shake to smooth out any lingering wrinkles.

A shirt I can wear in public.

A shirt I can wear in public.

And pro-tip for collars and cuffs – vinegar doesn’t put the crease back into these – use a hair straightener! As long as you are not using product in your hair before straightening it, your ceramic plates are nice and clean, and perfect for handling those tricky small areas that are difficult to handle even with an iron. Men, do not be afraid to borrow your ladies’ straightener for pressing an impressive collar.

Let me know if you try this out, and enjoy this method!

Adventures in Rental Decoration

Adventures in Rental Decoration

Pre-painted walls, pre-scuffed flooring, old cupboards…. Rental apartments can be boring, and definitely a little worn looking. Having lived in three apartments and a dorm room in the last six years, I’m definitely a little tired of not having a space which reflects a little of my own personality.

Putting up pictures and posters is definitely a great way to start shaping your space and giving it some colour and spark, but there are definitely some areas where that artsy poster you picked up at the campus poster sale four years ago just won’t cut it.

Prime example: the fake-wood closet doors that are oh-so-common in many rental spaces.

You know  – the dark brown ‘wood’ doors mounted on sliders that cover your entrance closet or hide the laundry in your bedroom. I personally haven’t seen a single apartment that has a paint scheme that actually matches those doors, and they can also really darken a space. Yes, you can un-hinge them and store them somewhere if you have the space, but not a lot of people do. This also leaves your nice hidden storage spaces exposed, showing your messy collection of coats, shoes, and random items to all of your guests.

In my apartment, I have three of these doors in my entrance-way, and it created a rather dark, and less appealing welcome than I wanted in my apartment. Luckily, I found a solution while browsing online that worked for me, both time-wise and budget-wise.

How About Orange has a great tutorial on how to cover your doors using fabric, water, and cornstarch! I read this blog, and got really excited – I also tried a test swatch on my doors to see if it worked, and got even more excited, because it definitely did. Using cornstarch and water, you make a paste that easily adheres fabric to surfaces, and then gets easily dissolved later using warm water for easy removal!

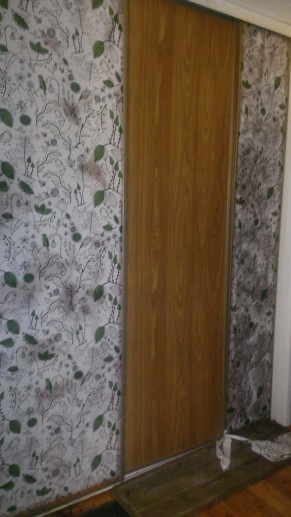
Less than picturesque doors in the process of being covered up!

Less than picturesque doors in the process of being covered up! The dark spots are where the cornstarch mix is still wet, and not dried.

Instructions are easy and simple:

1. Find a fabric you like ( I got mine on a ‘last chance’ sale at Ikea!), and get enough to cover your doors (or walls, or whatever else you want to cover). Cut it to size, by carefully measuring it! Use a sharp fabric knife/craft knife to get a nice even cut, but don’t worry about hemming the edges, because they’ll get ‘glued down’ with the cornstarch paste.

2. Mix up your cornstarch paste (“goop”): take 3/8 of a cup of cornstarch, and mix in a little bit of water so you have a thick paste, that is not lumpy. Boil 4 cups of water in a pot, and then add the thick cornstarch paste – if you don’t pre-mix the cornstarch, you end up with a lot of little cornstarch lumps in your mix that don’t dissolve, so don’t skip that step.

3. Paint the doors! Use a nice big painters brush (pick one up at the collar store for cheap), and thickly lay on the cornstarch paste. It’s pretty thick, so it doesn’t drip very much, but do lay down some newspapers to catch the odd drip.

4. Put up the fabric! Start at an upper corner (if you’re short, like I am, make use of a tall roommate or family member), and slowly press the fabric into the paste as you move down from the top. If you get an air bubble, just lift up the fabric and re-position it; it takes a little while for the paste to dry, so you have some time to re-work any errors while putting up the fabric.

5. That’s it! Let it dry, try not to move it while it’s drying – it should be completely dry within a few hours/overnight (depending on humidity and temperature).

When you’re ready to move out, or you’ve decided you’re bored with the fabric, the great part is that the whole thing is an easy fix – grab a large sponge of warm water and soak your fabric. This dissolves the cornstarch, and the fabric peels right off.

Finished doors with a black ribbon accent where the fabric wasn't long enough; it hides where the seam is!

Finished doors with a black ribbon accent where the fabric wasn’t long enough; it hides where the seam is!

How durable is this? I put my fabric doors up last year, and there isn’t a single thread that’s started coming loose! And if something did work its way loose, all you have to do is mix up some new paste, and brush it over the loose edges, which will put them right back in their place.

If you give it a try, let me know how well it works for you!

Let’s shave a cat.

Let’s shave a cat.

Yep, that is exactly what I did this past Friday night; myself and a friend shaved my cat!

I doubt you had a more exciting Friday night than I did.

She has no idea what's in store for her...

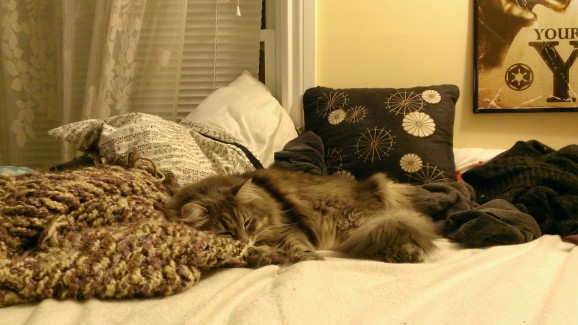
A still fluffy, and very unsuspecting cat.

My cat is is quite adorable, very fluffy, and has difficulty grooming her back end – of course I try to brush her, and help keep her coat in good condition, but sometimes mats manage to happen despite my best efforts. If you own a long haired cat, I do strongly suggest buying food supplements that support good coat health, such as Fish Oil (available in tasty flavours from pet stores specifically for cats, or at your local drug store), or Nupro Health Nuggets for Cats.

Nope, I’m not selling anything! But this is a supplement I regularly feed to my cat because it disguises itself very well in her dry food, and provides remarkable help in preventing dandruff, shedding, and mats. It’s made with great ingredients, and focuses on providing extra nutrition that also happens to help with skin and coat. I got lazy, and didn’t pick up more of this supplement when I ran out a few weeks ago – and I swear to god, within a week my cat had developed large, tough-to-remove mats. Now, neither she or I are fans of trying to comb them out, and attempting to cut them out with grooming scissors was also definitely not working.

My options included:

  • holding down an unhappy cat and attempting to continue brush/cutting mats while remaining at extreme risk of flesh wounds (cat claws are effective),
  • paying upwards of $70 to get my cat professionally groomed,
  • or taking advantage of a skilled friend who could help me shave my cat, to remove mats quickly and with less trauma than taking my cat to a strange grooming parlour.

Luckily, my BFF Kelly happens to already have a love-hate relationship with my cat, as well as clippers and experience in shaving cows.

LET ME LOVE YOU!

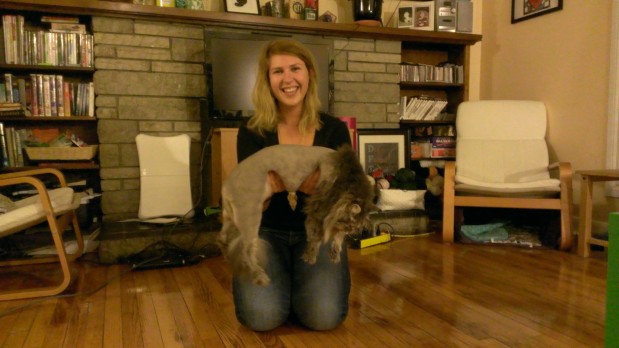
Fish does not always enjoy being forced to experience Kelly’s love.

Kelly grew up on a farm, and has many years experience in shaving cows for 4-H competitions, understands how to handle animals who are not currently happy, and got REALLY excited when I asked if she wanted to help me shave my cat.

Having previously lived with Kelly for a year, Fish (yes, that is my cat’s name) has gotten used to forced cuddles, and remains remarkably still whenever Kelly holds her in odd positions – this was a huge asset in clipping her. The actual clipping process itself went surprisingly well, possibly due to this ‘conditioning’.

Two false starts initiated the adventure, due to less-than-sharp clipper blades – but once the third set proved to be sharp, the hair started almost flying off the cat while I rushed to pick it up and get it in the garbage. Fish stayed quite still throughout most of the process, and made only a few unhappy noises – normally, just approaching her with a comb is enough of an offense to be at risk of experiencing flesh wounds. Fish certainly wasn’t happy with having her legs tugged straight, or tail held in an easy-to-shave position, but she did let us do it, and without too much protesting.

She put up much more of a fight when I gave her a bath afterwards to clean up her remaining fur – she was decidedly against the bath experience, on top of the shave experience.

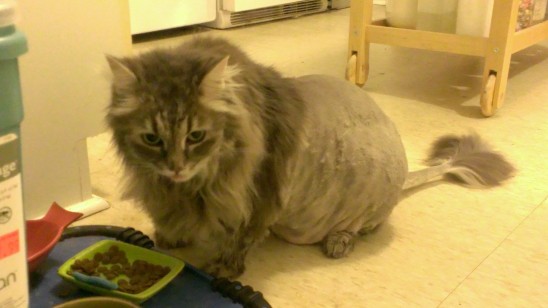
Or rather, quickly munches her kibble.

The mighty lion devours her prey.

The end result was a lion-cut shave on a cat that definitely needed some more maintenance done on her coat than I had provided recently (sorry, cat). It also included a slightly self-conscious cat, who has been seeking validation through extra cuddles while she adjusts to having lost a majority of her fluff.

Next steps include getting more Nupro Nuggets to help prevent future mats, and helping her lose weight so she can also better groom herself (with continuing help from a comb).