Friday Recipe: Peanut Butter Cup Crack Brownies

Friday Recipe: Peanut Butter Cup Crack Brownies

Make these!

Immediately!

They are insanely delicious- thank you pinterest for your gifts of deliciousness and DIY ideas.

These brownies are topped with miniature Reese’s Peanut Butter Cups, and then an additional layer of chocolate-peanut butter-rice krispie goodness. I ate the whole pan in two days.

This recipe is courtesy of Culinary Couture, and I would definitely recommend checking out her blog for more deliciousness.

peanut-butter-cup-crack-brownies

Sooo good.

Ingredients

1/2 cup all-purpose flour
1/3 cup Hershey’s cocoa powder
1/4 teaspoon baking powder
1/4 teaspoon salt
8 tablespoons (1/2 cup) unsalted butter, melted
1 cup granulated sugar
pinch of vanilla powder (or 1 teaspoon vanilla extract)
2 eggs

1 and 1/2 cups mini unwrapped Reese’s peanut butter cups

3/4 cup milk chocolate chips
1/2 cup peanut butter
1/2 tablespoon unsalted butter
1 cup Rice Krispies

Preheat oven to 350 F.  Spray an 8×8 inch pan with non-stick cooking spray and set aside.

In a medium-sized bowl, whisk together flour, cocoa powder, baking powder, and salt. Set aside.

In another medium-sized bowl, using an electric hand mixer, beat together melted butter and sugar until well-combined. Add eggs and vanilla, and beat until well-incorporated.

Using a spoon, stir in dry ingredients. Pour batter into prepared pan and bake for 20 minutes.

After 20 minutes, sprinkle the mini Reese’s peanut butter cups on top. Then, return to the oven and bake for an additional 5 minutes. Definitely check this after the 5 minutes – sometimes it may need an additional minute or two!

In the meantime, melt together the chocolate chips, peanut butter, and butter over a double boiler or in a microwave. Once completely smooth and melted, stir in Rice Krispies and mix together to evenly coat.

Immediately after removing the brownies from the oven, spread the Rice Krispie layer on top. Let cool to room temperature, then refrigerate for 2 hours before cutting and serving.

Let me know if you enjoy the recipe! I know I did!

Friday Recipe: Experimental Melon Drop Sangria

Friday Recipe: Experimental Melon Drop Sangria

It’s been a little while since I’ve posted – I’ve been in the middle of my final weeks of school!

Our major client presentation took quite a lot of energy and time, but was absolutely worth it – from the six teams competing in my class presenting to our client, my team was chosen as the winner! Our client has chosen to implement our marketing plan, and I can’t wait to see how those changes work for them. Compared to our major project, my last week of exams was a walk in the park. The nice thing about showing up to class and doing well on all your projects is that once you’re making your study notes, you realize how thoroughly you know your stuff.

Now that our exams and project are finished, it’s time to celebrate! Over the last couple of months, I’ve been working with the Marketing Consulting Team at Algonquin to plan our final celebration, and tonight our graduating class is celebrating at a wonderful dinner down town!

Myself and a number of friends are getting together before heading out tonight, and despite the unseasonably cold weather today (currently about 4 C), I decided to make some celebratory sangria. I’m currently dubbing it ‘experimental sangria’, seeing as I’ve made it from mostly ingredients I already had in my fridge and freezer  – I love how versatile sangria is as a creation.

Ingredients gathered from the back of the fridge!

Ingredients gathered from the back of the fridge!

I wanted to give this sangria an extra special twist, and decided to try incorporating one of the teas out of the Spring Collection at Davids’ Tea, Melon Drop. This tea immediately won me over when I tried it – it’s a delicious mix of honey dew and watermelon, accompanied by apple, papaya, and kiwi. To add this into my sangria, I brought some water to steaming hot, and steeped it at triple strength to get it extra flavourful.

Tea is one of my favourite things.

Tea is one of my favourite things.

To add to that base, I pulled oranges out of my fridge, and some frozen mango out of my freezer. I topped it off with some Dr. McGillicuddy’s Intense Peach and one of my favourite wines, Gazela, a vino verde from Chile (and it’s extremely affordable, $8.99 from the LCBO!).

And some items from the LCBO.

And some items from the LCBO.

Experimental Melon Drop Sangria

2 cups Melon Drop Tea
2 Handfuls Frozen Mango
1 Orange, sliced
1/3 cup Dr. McGillicuddy’s Intense Peach
1 bottle Gazela (or another wine! Choose one you love!)

Oranges.

Oranges.

Liquids.

Liquids.

I prepared my sangria directly in my Davids’ Iced Tea Pitcher, with it’s built in steeper for the tea. If you are also doing this, start by bringing your water to steaming hot, and adding two cups into your pitcher along with triple the amount of tea called for. If you are not preparing this tea in a pitcher, I would suggest preparing the tea in a glass measuring cup or really big mug. Using tea filters is one of the easiest ways to steep your tea, as tea balls will not hold enough tea! Bring your water to boiling, and add it directly to your tea. Let your tea steep for at least 10 minutes.

Once the tea is well steeped, transfer it into your pitcher (or keep it in your pitcher, if you started with one), but don’t throw away your tea bags. Add the mango, orange, and Intense Peach, topping it off with your wine. Put the tea bags back in, and move your sangria into the fridge to chill.

To serve, remove the tea bags, and put a couple of frozen mango pieces in each wine glass before pouring – this will keep your sangria deliciously cold! (and gives you a snack when you’re done).

Finished product, off to chill!

Finished product, off to chill!

If you like, add some simple syrup to your sangria when adding fruit to sweeten this up. Simple syrup is super easy to make: boil equal parts water of sugar until the sugar has dissolved, and let it cool. That’s it!

Let me know if you like this sangria recipe, and I’ll share more over the summer!

Friday Recipe: A Delicious Method of Eating Easter Candy

My family isn’t super religious, but we certainly do enjoy our holiday meals.

Easter dinner this year was smaller than it has been in the past – my immediate family (mom, dad, two brothers, and my sister-in-law), live in Ottawa and we had a great family dinner consisting of delicious ham and several sides. Quite often in the past, my family drives down to Oshawa where my grandparents lived, and where a large part of my extended family still resides.

We have jokingly referred to these meals as ‘feeding the thousands’. Over the years for Christmas, Thanksgiving, Easter, and other family events, we have gathered the many members of my extended family in the home of my Aunt Judy to eat (read: demolish) meals consisting of both a ham and a turkey, a minimum of four types of cooked veggies, salad, bread rolls, more than one crock pot full of mashed potatoes, scalloped potatoes, and various other items. We also always finish up with dessert. Usually two or three cookie and square trays, a minimum of three (usually more) pies – apple and pumpkin are popular – and frequently some sort of other interesting and delicious dessert. Possibly a cheesecake.

Although these family get togethers involve a lot of noise, overeating, and the discreet requesting of names of extended family members I don’t know very well, I have always loved them. Getting to see these members of my family I don’t get to see regularly is always a highlights of the holidays. We laugh, we eat (too much), and we play a lot of music.

That said – sometimes it’s really nice to not hop in a car and drive four hours only to have to drive four hours to get home again two days later!

This years small gathering was wonderful – and my mom, as always, sent us kids away with a bag full of Easter candy and a chocolate bunny. The chocolate bunny didn’t last long (being consumed over the next two days), but I decided to get a little more creative with some of my other Easter chocolates – primarily, that king of Easter candy, the Cadbury Creme Egg.

WP_20150407_012

Sooo delicious!

WP_20150407_010

A key ingredient in many of my recipes.


Creme Egg Croissants

1 package Pillsbury Croissants
Cadbury Creme Eggs
Assorted other chocolate


Pre-heat your oven to 375 F. Grease either a cookie sheet or a muffin tin – both work work well. Wrap up your Creme egss or other chocolates inside of your croissant – but don’t get stuck on the idea of a perfect croissant shape! Some of my croissants were more turn-over shaped, and others turned out more muffin shaped. Place those bad boys in the the oven for about 10 minutes.

Voilà! Deliciousness wrapped up inside more deliciousness.

What lies inside this golden delicious pastry?

What lies inside this golden delicious pastry?

I may have eaten three of these immediately.

I may have eaten three of these immediately.

(Not) Friday Recipe: Chocolate Wonders

Final projects are on, client presentations in school are upcoming, and excitement is being generating from my upcoming graduation – sadly, all of this ended up resulting in my absent-mindedness this week, and the missing of not one, but two updates. I’m sorry!

So, in apology, here’s one of my favourite easy cookie recipes: chocolate wonders!

They are super delicious, super easy to make cookies, that do not require baking. You can easily whip up a batch of these in ten minutes or less, and impress friends and family with their deliciousness. I love these cookies – more than once, I have made these in the morning before rushing off to school, when I’ve needed cookies for focus groups, impressing clients (business school, remember), and bake sales. I can make them while I’m eating breakfast, and they’ll be ready to go by the time I’m ready to leave – they are just that easy and fast.

Photo courtesy of Crazy Sweet Life

Chocolate Wonders (also known as chocolate haystacks in some households!)

2 cups sugar
1⁄2 cup milk
1⁄2 cup butter
1⁄2 cup cocoa
1 dash salt
1⁄2 teaspoon vanilla
3 cups rolled oats
1 cup flaked coconut

Add the sugar, milk, butter, cocoa and salt to a saucepan, and heat to boiling, stirring constantly. Let it boil for about 1 minute, then remove from heat. Add vanilla, oats, and coconut, stirring everything in quickly.

Drop by spoonfuls onto wax paper, let them cool, and enjoy!

These also keep very well in the freezer, if you want to make them ahead of any events or parties : )

Friday Recipe: Earl Grey Tea Cookies

Friday Recipe: Earl Grey Tea Cookies

I’ve been informed by a couple of my non-baking friends that they are not completely sure as to what the picture my website banner is showing…

For those particular friends, they are cookies – specifically, some of my favourite Earl Grey Tea cookies!

A super easy cookie to make, that uses nothing particularly special, this recipe was given to me by my friend Melissa! Melissa is someone I’ve known literally my entire life, and her family, mine, and one other all lived on the same little dirt road in the country. Growing up in a rural area with children all in the same age range was quite helpful for our parents – their children has nearby friends that they could walk over to see, and they had nearby neighbours who could frequently help out with child care.

These days, we’re all spread out a little farther – some of us kids have stayed in Ottawa, but others have moved to Montreal and Toronto, or moved around to a few different places. Despite all this moving, whenever we’re all back home visiting for the holidays we often try to get together for tea – a long standing tradition among our little group. Around holidays, we all attempt to bake some goodies, and get together for a chat over a cup of tea. It’s a really nice way to stay in contact with old friends, and catch up on what everyone is up to these days.

Mmm, butter...

Only seven, totally pronounceable ingredients! Although yes, a lot of butter…

It was during one of these teas that Melissa shared her Earl Grey Tea cookies, and I immediately fell in love and requested the recipe! She gladly shared it, for which I was definitely grateful. One of the best aspects of this recipe is that I get to use my food processor for easy and quick assembly of this dough. These cookies are also very easy to pair with various different types of icings or glazes if you want to add a little twist on flavour, but are wonderful without as well!.

It's all 'bout that dough

Don’t forget the water with this step, it helps create a better dough.

Early Grey Tea Cookies

2 cups flour
1/2 cup sugar
1/2 icing sugar
2 tablespoons Earl Grey Tea, or about 6 teabags
1/2 tsp salt
1 tsp vanilla
1 cup butter, cubed

Place all dry ingredients into the food processor and pulse until well blended. Add vanilla with one tablespoon of water, and butter, and pulse until a dough is formed – about one minute. The dough will be a little crumbly, but should be a little dense and form fairly easily when pressed and rolled.

Roll the dough into two logs, about 1 inch in diameter. Chill about 30 minutes.

Yay, dough!

Dough should look like this!

Slice the dough, about 1/4 inch thick slices, and place on a greased cookie sheet.
Bake at 375 F for 10 minutes, or until the bottom edges start to turn golden brown.

These are delicious to enjoy with a cup of tea, and if you want to fancy them up a little bit, top them with an icing glaze – vanilla or lemon go particularly well! This is the lemon glaze I used last time I made these cookies, and that batch is the one pictured in my blog banner! It’s a particularly delicious and simple recipe (and those cookies really did NOT last long).

Let me know if you enjoy the cookies!

Mmm, cookies!

Mmm, cookies!

Friday Recipe: Honey Sesame Chicken

Friday Recipe: Honey Sesame Chicken

As you know, I’m a student, and as I’ve addressed in a previous post, I sometimes simply have NO TIME to cook, which means that I end up eating less-than-healthy food.

And, as a student, I don’t think I can say enough how much I LOVE MY SLOW COOKER. Because that bad boy takes whatever I toss in, and turns it into amazing meals. Prep can take minutes, and there are no issues with leaving that particular appliance plugged in all day (unlike a hair straightener…)

As well, slow cookers can be surprisingly reasonable to buy – if you get the original Crock-Pot, no frills (like timers, etc.), then it actually costs less than $30.00! Or free, if you drop the right hints around Christmas time.

Slow cookers are amazingly versatile – open up Pinterest and type in ‘Slow Cooker’, and you’ll be amazed at the variety of recipes it gives you. Dinners, appetizers, sauces, desserts, and even crafts are are made super easy with my favourite kitchen appliance (well, it’s tied with my George Foreman grill, and my food processor…). You can even buy crock pot liners if you hate washing the pot after you’ve finished cooking!

One of the things I love most about my slow cooker is that all of the meals that come out of it are super easy to freeze and keep for later lunches and dinners, which makes my life easy in the morning – I can just grab a tupperware container out of the freezer and pop it into the microwave when I’m at school for something that’s delicious, and doesn’t cost me money.

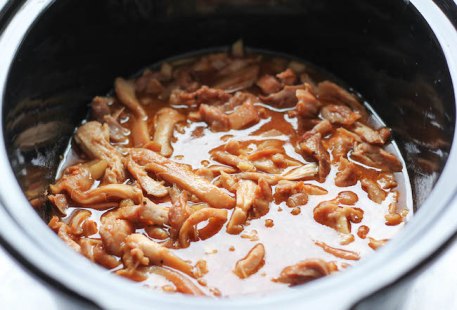
With that all said, this recipe for Honey Sesame Chicken (which I found from Damn Delicious, photos also from there!) is crazy easy, and one of my favourites to make for later lunches.

Slow cookers: making my mouth water since 1990.

Slow cookers: making my mouth water since 1990.

I often make this one on Saturday or Sunday afternoon, because it takes less time than many other slow cooker recipes. I also love it because it uses simple ingredients, which are regularly stocked in my pantry. As well, chicken thighs go on sale for dirt cheap quite often – so whenever I see those on sale in my grocery flyer, I have a good idea of what meal I’m going to make this week!

Honey Sesame Slow Cooker Chicken

1 small onion, diced
2 cloves garlic, minced
1/2 cup honey (spray your measuring cup with cooking spray for easy pouring)
1/2 cup soy sauce
1/4 cup ketchup
2 tablespoons vegetable oil
1/4 teaspoon crushed red pepper flakes
2 pounds boneless, skinless chicken thighs
Kosher salt and freshly ground black pepper, to taste
1 green onion, thinly sliced for garnish
Sesame seeds, for garnish

In a large bowl, combine onion, garlic, honey, soy sauce, ketchup, vegetable oil and red pepper.
Season chicken thighs with salt and pepper, to taste. Place chicken thighs into a slow cooker. Add honey mixture and gently toss to combine. Cover and cook on low heat for 3 hours and 30 minutes.
Remove chicken thighs from the slow cooker and shred the chicken before returning to the pot with the juices. Cover and keep warm for an additional 30 minutes.
Serve immediately, garnished with green onions and sesame seeds, if desired. Serve over a bed of brown rice, and freeze leftovers in lunch-sized portions for meals all week!

Definitely one of my go-to slow cooker recipes!

Definitely one of my go-to slow cooker recipes!

Notes:

I hate tomatoes! That also extends to ketchup – so I make this without any, and I find it completely delicious. If you DO like tomatoes (you freak), but don’t like ketchup, try adding in some fresh or canned diced tomatoes.
I also substitute half of the vegetable oil with sesame oil to give a richer sesame flavour – but not a straight substitute because sesame oil is expensive!
Also, if you really like spice, go ahead and add some sambal oelek – Thai red pepper and garlic sauce – in the bowl with the other ingredients. This sauce mixes perfectly well with the other ingredients, and adds another element to the flavour. I know it’s not likely a regular pantry staple in many kitchens, but I definitely suggest keeping some on hand – it adds well to stir-frys, asian dishes, and more! You can buy it in the asian foods section of your grocery store.

I’d love to hear what readers think of this recipe, when they’ve had a chance to try it at home!

Friday Recipe: Honey Sriracha Chicken

Friday Recipe: Honey Sriracha Chicken

Do you get a craving for something with a kick to it every once in a while?

I certainly do, and I am also 100% on board the Sriracha flavour train!

This super easy stir-fry chicken comes from Prevention RD, written by Nicole Morrisey. The mouth-watering photos come from her blog as well!

This is a recipe that takes almost no prep time, and is dead-easy to make (and almost impossible to screw up!). I love these sorts of recipes for when I get home after a long day at both work and school, because I can quickly turn out something that is healthy and delicious. One other great thing I love about stir-fry recipes is how versatile they are – you can mix up the sauce, but sub in whatever meat or vegetables you want and if you’re feeling confident in your skills, you can leave the road map behind and experiment!
Honey Sriracha Chicken 3
This particular recipe is easy and basic, and calls for cubed chicken to be stir-fried with the honey-sriracha sauce. I try to get a lot of vegetables into my meals, so last time I made this I also through in a LOT of broccoli, which takes the sauce really well! I imagine that bean sprouts would also mix well with this particular recipe, and certainly any other type of meat you have on hand could be cooked up instead of chicken.

Honey Sriracha Chicken

  • 1 lb boneless skinless chicken breasts, cut into bite-sized pieces
  • Lots of delicious vegetables (broccoli, snap peas, whatever!)
  • ⅓ cup honey
  • 2 Tbsp sriracha
  • ½ tsp garlic powder
  • 1 Tbsp low-sodium soy sauce
  • ½ tsp onion powder
  • ¼ cup water + ½ Tbsp cornstarch
  • 4-5 scallions, chopped (for garnish)

Heat oil (or use cooking spray) in a large frying pan or wok (wish I had one!), and add the chicken, stirring occasionally until it is cooked through – about 5-6 minutes. Toss in your veggies, and get them cooking, stirring occasionally.

Meanwhile, mix up in a small saucepan your honey (pro-tip – if measuring out your honey, spray the measuring cup with cooking spray first, and the honey will slide right out, no sticking!), sriracha, garlic powder, soy sauce, and onion powder; bring to a low boil over medium-low heat. In a small bowl, whisk to combine the water and cornstarch; add to the sauce pan and whisk well. Cook until sauce thickens, about 2-3 minutes. Add sauce to chicken and toss to coat.

Serve over top of rice ( I love brown basmati rice), with your scallions to garnish!

Note: If you are lazy (like I am), instead of mixing the sriracha sauce in a saucepan, mix all the ingredients except for the cornstarch in a bowl (and use less water than is called for), and then just toss straight into the frying pan. The consistency will be different, but still delicious!

This meal also freezes really well – I froze at least two portions in tupperware for lunches later on, and it certainly stays delicious. Let me know if you enjoy the recipe!

Friday Recipe: Baguette and Brie Appetizers

Friday Recipe: Baguette and Brie Appetizers

Appetizers!

Or, in reality – dinner. Because you know  you are eating that much of this ‘appetizer’.

Om nom nom – super simple baguette, brie cheese, and Farmboy mango peach red pepper jelly!

I love these super simple snacks that are easy to prepare and share. These make an excellent item to have at parties, or to share with a couple of friends while having a wine and cheese night.

This stuff is delicious. Also try the raspberry red pepper jelly!

This stuff is delicious. Also try the raspberry red pepper jelly!

Bread, cheese, and red pepper jelly are all delicious, and I absolutely love Farmboy variations on red pepper jelly, because they do an excellent job.

Baguette and Brie Appetizer

1 baguette, sliced thinly – or thickly, however you prefer.
Brie -sliced thinly – or thickly – to top each baguette slice.
Red pepper jelly, spooned on top

Bake at 425 fahrenheit for about 5 minutes, or until the brie is melted and delicious!

Enjoy!

Yum! Enjoy with a glass of wine, or your other favourite drink.

Yum! Enjoy with a glass of wine, or your other favourite drink.

Friday Recipe: Banana Chocolate Chip Muffins

Friday Recipe: Banana Chocolate Chip Muffins

Alrighty, bringing this out of my mother’s recipe book for you!

This is my favourite banana(nanananana) muffin recipe – yes, I am definitely experiencing bias because this is the recipe that I grew up with, but I have had to substitute with other recipes in the past, and never had quite so delicious muffins as when I follow this one.

To me, this recipe is school lunches, midnight snacks, and warming breakfasts – it’s delicious, can be modified to be (less un-) healthy, and is much more delicious than any store bought muffins.  Yes, yet again I am biased – to this day, I do not buy muffins from cafeterias, cafés, or even Timmies (Tim Hortons, if you’re not Canadian), because they are absolutely not nearly as delicious – and certainly even worse for your health – than muffins I can make for myself.

Additionally, this is also the favourite recipe of my young cousin – I will drive for four hours to go visit family, and within ten minutes of arriving, I can almost guarantee hearing the question “Can we make chocolate chip muffins, Emily?”. Even the little people love it!

My cousin is a pro at operating the 'pulse' button on the food processor. She is also better at cracking eggs than I am!

My cousin is a pro at operating the ‘pulse’ button on the food processor. She is also better at cracking eggs than I am!

Bonus: This entire recipe can be made with a food processor if you own one, which drastically cuts down on prep time! I love my food processor, and bought mine when Zellars went out of business, and I could pick it up for super cheap… Check out your local Target if you want one – they are currently going out of business in Canada, and may have started finally offering better deals for liquidation stock!

Banana Chocolate Chip Muffins

1/4 cup butter
1 cup sugar

3 large bananas
2 large eggs

1 1/2 cup flour
1/2 tsp salt
1/2 tsp soda

Chocolate Chips

Pre-heat your oven to 350 Fahrenheit. Cream butter and sugar. Add bananas and eggs (If you keep bananas around, but find them going bad, toss them in the freezer! When you defrost bananas from the freezer, they actually mix better into recipes than fresh bananas!) If using the food processor, pulse several times – I have found that a couple extra pulses help the muffins to rise better in the oven ( I have no idea why, but it seems to work).

Add dry ingredients – mix/pulse, then scrape down the sides of your bowl/food processor, and pulse again.

Add your chocolate chips, mixing, not processing – as many chips as you feel necessary – and pour batter into a greased muffin pan. Bake at 350 for 10-12 minutes.

Delicious muffins...

Delicious muffins…

As stated, this is my all-time favourite muffin recipe – let me know what you think, and let me know what interesting variations you can come up with!

Supplementary note: feel like somewhat healthier muffins? Replace all-purpose flour with whole wheat flour, these muffins do well with either!

Friday Recipe: Island Pork

Alright, this one was delicious.

A+, cooking again, telling all my friends about it, delicious.

Sidenote : I love pinterest.

Island Pork Tenderloin - this is an absolutely delicious recipe, that's a little different from most of the pork tenderloin recipes I see! Definitely a keeper and it only takes 5 minutes to prepare!

This delicious recipe was called ‘Island Pork”, and came from Little B Cooks, who adapted it from the Gourmet Cookbook. I found it using Pinterest (such an awesome resource).

It was also cheap and easy to make, a definite choice for anyone looking to cook who has little time for prep and little budget.

As I mentioned in one of my earlier posts, I try to stick to a weekly meal plan in order to make the best use of weekly flyers and the food in my fridge. Lucky for me, not only was pork tenderloin on sale, but I was also getting points on my grocery card for purchasing it! I got 1400 points, and two pork tenderloins, bringing me a little bit closer to free groceries. I also had lots of leftovers to use for the rest of the week.

It was nice to find this recipe – a lot of recipes for pork call for either a balsamic glaze or a recipe with apples. Finding something that was different was a really nice change from the usual. The spice rub mix uses chili, cumin, and cinnamon, along with some pepper, and creates a wonderful mix of flavours that is rather unique. As for the sauce, I don’t actually have any Tabasco sauce in my fridge, but found that substituting with some sambal oelek – thai chili garlic sauce – seemed to work just fine.

I admit I like to cut corners as well – the original recipe calls for browning the pork tenderloin before putting it in the oven; instead I chose to let the tenderloin marinate for about 30 minutes, and then just popped it straight into the oven and added the sauce about 20 minutes in.

I roasted some broccoli with some of the leftover spice rub, and that was the perfect side dish!

Island Pork

For spice rub:
2 tsp salt
½ tsp pepper
1 tsp cumin
1 tsp chili powder
1 tsp cinnamon
2 pork tenderloins (2 ¼ – 2 ½ lbs total) trimmed
2 tbsp olive oil

For Glaze:
¾ cup packed dark brown sugar
2 tbsp finely chopped garlic
1 tbsp Tabasco sauce – or substitute with Sambal Oelek (although any hot sauce will likely do!)

Mix together the spice rub, and let the pork tenderloin marinate for about 30 minutes.
Pre-heat the oven to 400 F, and cook the tenderloin 20 minutes, then pull it out and pour on the glaze (which if you were clever ,you prepared during the previous 20 minutes!). Let the pork cook for about 10 more minutes, or when the internal temperate reaches 140 F.

Want some delicious veggies to go along with that? Make a little bit extra spice mixture and add a bit more olive oil than the recipe calls for. Toss your veggies with the mix, and pop them into the oven right after you add the sauce onto the pork tenderloin! They should finish roasting up as soon as the pork it done.

Enjoy!